Taking captivating photos of your artwork is crucial for making sales. Buyers want to see exactly what they’re purchasing, and high-quality photography can make all the difference. Follow these tips to ensure your artwork shines:
Why Great Photos Matter
Excellent photography can transform casual interest into a confident purchase. Customers prefer clear, detailed images that eliminate any doubts about the artwork.
Essential Photos for Every Artwork
We require three photos for each listing:
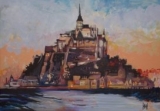
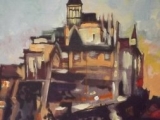
- Main Photo (Gallery Photo): A clear, full-frontal image of the entire piece, including the frame (if applicable). No background walls or distractions.
- Detail Photo: A close-up showing texture, brushstrokes, or intricate details.
- Side View: A photo of the artwork’s edge, showcasing its depth and how it might look when displayed.
Step-by-Step Guide to Photographing Your Artwork
Main Photo: The Gallery Image
- Purpose: This will appear in search results and galleries.
- Tips:
- Capture the entire artwork, including the frame (if framed).
- Avoid any background—crop the photo to focus solely on the artwork.
- Shoot directly from the front to avoid distortion or skewed angles.
Detail Photo
- Purpose: Highlights the texture, technique, and finer details.
- Tips:
- Focus on a small section of the artwork.
- Show brushstrokes, canvas grain, or intricate elements.
Side View Photo
- Purpose: Gives customers an idea of the piece’s physical depth.
- Tips:
- Photograph the edges or sides, especially if it’s a canvas or framed work.
- Highlight features like a stretcher or frame thickness.
Optimal Setup for Photography
Lighting
- Choose soft, natural light—a large window on an overcast day works best.
- Avoid direct sunlight, harsh shadows, and artificial lights, which can distort colors.
- Turn off your camera’s flash to maintain true-to-life colors.
Background
- Use a clean, neutral background. For sculptures, ensure the background doesn’t distract from the artwork.
Camera Settings
- Use a low ISO (100 or 200) for sharp, high-quality images.
- If possible, use a tripod or stable surface to avoid blur.
- Point the camera straight at the center of the artwork to prevent skewing.
Orientation and Framing
- Ensure the camera is positioned properly to avoid unintended rotations.
- Leave minimal background space around the artwork for easier cropping.
Preparing Photos for Upload
Editing and Cropping
- Adjust brightness and contrast minimally to reflect accurate colors.
- Crop the main photo to display only the artwork (and frame, if included).
- Rotate any incorrectly oriented images.
File Requirements
- Dimensions: Images should be at least 1000 pixels wide, ideally no more than 2000 pixels in width or height.
- File Format: Save as JPEG with the highest quality.
- File Size: Ensure the file is under 15MB. Reduce JPEG quality if needed.
Common Reasons for Rejected Photos
To maintain a high standard, Art Carma may reject listings with:
- Extra background in the gallery photo. Crop everything unrelated to the artwork.
- Incomplete artwork views. Show the entire piece, including frames.
- Skewed or off-center photos. Always shoot square-on.
- Watermarks or distracting markings. Ensure no date stamps, borders, or watermarks are present.
- Blurry or poorly lit photos. Use proper lighting and ensure sharp focus.
- Insufficient photos. Include all three required views.
- Wrong photo orientation. Make sure all images are upright.
Once your photos are ready, you’re set to upload your artwork and share it with the world!